
Best Mechanical Keyboard Switches to Buy in July 2026
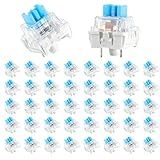
Keyboard Switches, 50 Pcs 3 PIN Blue Keyboard Clicker Replacement Dustproof Mechanical Keyboards Switches for Most Gaming Keyboards
-
SMOOTH ACTUATION: 50 PRE-LUBRICATED SWITCHES FOR CRISP RESPONSIVENESS.
-
VIBRANT LED SUPPORT: CLEAR HOUSING DESIGN ENHANCES BACKLIGHTING EFFECTS.
-
DURABLE DESIGN: WATERPROOF, DUSTPROOF, LASTING UP TO 50 MILLION KEYSTROKES.


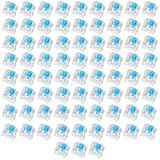
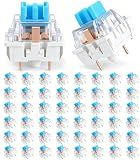
72 Pieces Blue Mechanical Keyboard Switches, 3 Pin Pre-Lubricated Clicky Key Switches, Dustproof and Waterproof Keyboard Accessories for Mechanical Gaming Keyboard
-
STYLISH DESIGN: BLUE AND WHITE COLORS PERFECT FOR CUSTOM KEYBOARDS.
-
DURABLE & WATER-RESISTANT: BUILT TO LAST WITH PREMIUM MATERIALS.
-
EASY UPGRADE: SIMPLE INSTALLATION ENHANCES ANY MECHANICAL KEYBOARD.
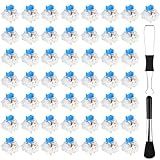
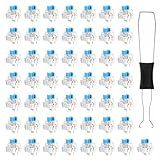
Deftomo 50 Pcs Blue Keyboard Switches, 3-Pin Clicky Tactile Mechanical Keyboard Switches, Complete DIY Replacement Kit with Switch Puller & Brush
- COMPLETE KIT: 50 SWITCHES PLUS PULLER & CLEANING BRUSH FOR EASY SETUP!
- BUILT TO LAST: DUST-PROOF & WATERPROOF DESIGN ENHANCES KEYBOARD LIFESPAN.
- TACTILE FEEDBACK: ENJOY SATISFYING CLICKS FOR GAMING & TYPING EXCELLENCE!

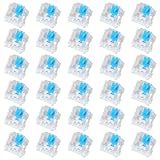
BlingKingdom 10 PCS Blue Switch Replacement 3 PIN Mechanical Keyboard Switches, Clicky, Accurate Typing, Dustproof, LED Keyboard, Gaming Keyboard
-
BRILLIANT LED BACKLIGHTING: ENHANCE YOUR SETUP WITH A SLEEK GLOW!
-
DURABLE & LONG-LASTING: 50M KEYSTROKES ENSURE RELIABLE PERFORMANCE.
-
TACTILE FEEDBACK & CLICKY SOUND: PERFECT FOR TYPING AND GAMING BLISS!
30 Pieces Blue Mechanical Keyboard Switches, 3 Pin Pre-Lubricated Clicky Key Switches, Dustproof and Waterproof Keyboard Accessories for Mechanical Gaming Keyboards
- STYLISH VALUE PACK: 30 BLUE SWITCHES FOR A CUSTOM LOOK AND GREAT GIFT!
- DURABLE DESIGN: WATERPROOF AND DUSTPROOF FOR LONG-LASTING PERFORMANCE.
- PRECISE ACTUATION: ENJOY SMOOTH TYPING WITH EXCELLENT TACTILE FEEDBACK!
50 PCS Keyboard Clickers for 3D Prints, 3 Pin Blue Mechanical Keyboard Switches with Switch Puller Waterproof Keyboards Clicker Keys Replacement for Gaming Keyboards
-
COMPLETE CUSTOM BUILD: 50 SWITCHES + PULLER, PERFECT FOR ENTHUSIASTS!
-
DURABLE & WATERPROOF: HIGH-QUALITY MATERIALS ENSURE LONG-LASTING PERFORMANCE.
-
CRISP FEEDBACK: ENJOY SATISFYING CLICKS AND PRECISE KEYSTROKES EFFORTLESSLY!
Bgxizin Keyboard Switches, 50 PCS 3 Pin Blue Keyboard Clicker, Permium Dustproof and Waterproof Mechanical Keyboards Switches for Gaming Keyboards
- SATISFYING CLICKS: ENJOY TACTILE FEEDBACK THAT RELIEVES STRESS.
- DURABLE DESIGN: WATERPROOF, DUSTPROOF WITH 50M KEYSTROKE LIFESPAN.
- VERSATILE COMPATIBILITY: PERFECT FOR MECHANICAL KEYBOARDS AND FIDGET BUILDS!
Replacing mechanical keyboard switches can be a straightforward process if you follow the right steps. Before you begin, make sure you have the necessary tools, such as a keycap puller, a soldering iron, solder wire, and replacement switches.
First, unplug your keyboard and turn it upside down to access the underside. Look for any screws or clips that hold the keyboard casing together and remove them using a screwdriver or by pressing the clips gently. Carefully separate the casing to expose the internal components.
Locate the switches that you want to replace. Start by using a keycap puller to remove the keycaps from these switches. Gently lift the keycap puller on each keycap and wiggle it until the keycap comes off. Repeat this for all the switches you want to replace.
Once the keycaps are removed, you'll see the switches attached to the keyboard's PCB (Printed Circuit Board). Each switch is soldered onto the PCB with two or three pins. Use a soldering iron to heat the solder joints of the switch pins, and when the solder melts, gently lift the switch off the PCB. Be careful not to overheat the PCB or damage nearby components.
With the old switches removed, take your replacement switches and align their pins with the corresponding holes on the PCB. Insert the pins fully and straight into the PCB. Ensure that the switches are mounted securely and level.
Next, apply a small amount of soldering flux to the switch pins to facilitate soldering. Heat your soldering iron and touch it to the switch pin, then quickly touch the solder wire to the heated pin. The solder should flow smoothly onto the pin, creating a strong connection. Do this for all the switch pins.
After soldering all the replacement switches, reattach the keyboard casing by aligning the tabs and screws properly. Make sure everything is secured and no internal components are sticking out.
Finally, place the keycaps back onto the new switches. Firmly press each keycap onto its corresponding switch until it clicks into place. Plug your keyboard back in and test the replaced switches to ensure they are working correctly.
What are the common methods used to desolder old switches?
There are several common methods used to desolder old switches. Here are a few:
- Soldering Iron: The most common method is to use a soldering iron to heat up the solder joint that holds the switch in place. Once the solder becomes molten, you can typically use a desoldering pump or solder wick to remove the old solder.
- Desoldering Pump: A desoldering pump, also known as a solder sucker, is a tool that creates a vacuum to suck up the molten solder. After heating up the solder joint with a soldering iron, you can place the desoldering pump on the joint and press the button to suck up the melted solder.
- Solder Wick: Solder wick, or desoldering braid, is another commonly used method. It is a braided copper wire coated with flux that helps to remove solder. To use solder wick, you heat up the solder joint with a soldering iron and then press the wick onto the molten solder. The wick absorbs the solder as it cools down, pulling it away from the switch and PCB.
- Hot Air Rework Station: Hot air rework stations are specialized tools that blow hot air onto the solder joint, melting the solder and allowing the switch to be easily removed. These stations typically have adjustable temperature and air volume controls, making them suitable for more delicate components.
When using any of these methods, it's important to be cautious and avoid damaging the PCB or surrounding components. Practice on scrap components or seek guidance from experienced individuals if you are new to desoldering.
Can I convert my non-mechanical keyboard to a mechanical one by replacing switches?
Yes, it is possible to convert a non-mechanical keyboard to a mechanical one by replacing the switches. In most cases, you would need to desolder the existing switches from the keyboard's circuit board and then solder new mechanical switches in their place. Additionally, you may also need to modify or replace other components depending on the specific keyboard. However, it is important to note that this process requires some technical knowledge and skills in soldering and electronics. If you are not confident in your abilities, it might be better to consult a professional or consider purchasing a pre-built mechanical keyboard instead.
Can I use hot-swappable switches in my existing mechanical keyboard?
In most cases, it is not possible to retrofit a keyboard with hot-swappable switches unless it was specifically designed to support them. Hot-swappable switches require a specific PCB (printed circuit board) and mounting mechanism to allow for easy removal and insertion of switches without soldering. If your existing keyboard does not have this feature, you would need to either purchase a keyboard that already supports hot-swappable switches or consider purchasing a new PCB that is compatible with your current keyboard case and supports hot-swappable switches.